【注意】最后更新于 January 17, 2020,文中内容可能已过时,请谨慎使用。
版权声明:本文为博主原创文章,遵循 CC 4.0 BY-SA 版权协议,转载请附上原文出处链接和本声明。 本文链接:https://blog.csdn.net/chenbaoke/article/details/42780887
jpeg包实现了jpeg图片的编码和解码
func Decode(r io.Reader) (image.Image, error) //Decode读取一个jpeg文件,并将他作为image.Image返回
func DecodeConfig(r io.Reader) (image.Config, error) //无需解码整个图像,DecodeConfig变能够返回整个图像的尺寸和颜色(Config具体定义查看gif包中的定义)
func Encode(w io.Writer, m image.Image, o *Options) error //按照4:2:0的基准格式将image写入w中,如果options为空的话,则传递默认参数
1
2
3
|
type Options struct {
	Quality int
}
|
Options是编码参数,它的取值范围是1-100,值越高质量越好
type FormatError //用来报告一个输入不是有效的jpeg格式
type FormatError string
func (e FormatError) Error() string
type Reader //不推荐使用Reader
1
2
3
4
|
type Reader interface {
	io.ByteReader
	io.Reader
}
|
type UnsupportedError
func (e UnsupportedError) Error() string //报告输入使用一个有效但是未实现的jpeg功能
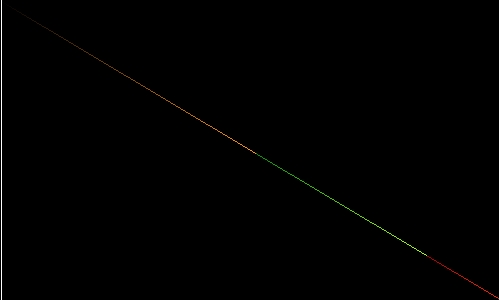
利用程序画一条直线,代码如下:
 1
 2
 3
 4
 5
 6
 7
 8
 9
10
11
12
13
14
15
16
17
18
19
20
21
22
23
24
25
26
27
28
29
30
31
32
33
34
35
36
37
38
39
40
41
42
43
44
45
46
47
48
49
50
51
52
53
54
55
56
57
58
59
60
61
62
63
64
|
package main

import (
	"fmt"
	"image"
	"image/color"
	"image/jpeg"
	"math"
	"os"
)

const (
	dx = 500
	dy = 300
)

type Putpixel func(x, y int)

func drawline(x0, y0, x1, y1 int, brush Putpixel) {
	dx := math.Abs(float64(x1 - x0))
	dy := math.Abs(float64(y1 - y0))
	sx, sy := 1, 1
	if x0 >= x1 {
		sx = -1
	}
	if y0 >= y1 {
		sy = -1
	}
	err := dx - dy
	for {
		brush(x0, y0)
		if x0 == x1 && y0 == y1 {
			return
		}
		e2 := err * 2
		if e2 > -dy {
			err -= dy
			x0 += sx
		}
		if e2 < dx {
			err += dx
			y0 += sy
		}
	}
}
func main() {
	file, err := os.Create("test.jpg")
	if err != nil {
		fmt.Println(err)
	}
	defer file.Close()
	nrgba := image.NewNRGBA(image.Rect(0, 0, dx, dy))
	drawline(1, 1, dx-2, dy-2, func(x, y int) {
		nrgba.Set(x, y, color.RGBA{uint8(x), uint8(y), 0, 255})
	})
	for y := 0; y < dy; y++ {
		nrgba.Set(1, y, color.White)
		nrgba.Set(dx-1, y, color.White)
	}
	err = jpeg.Encode(file, nrgba, &jpeg.Options{100})      //图像质量值为100,是最好的图像显示
	if err != nil {
		fmt.Println(err)
	}
}
|
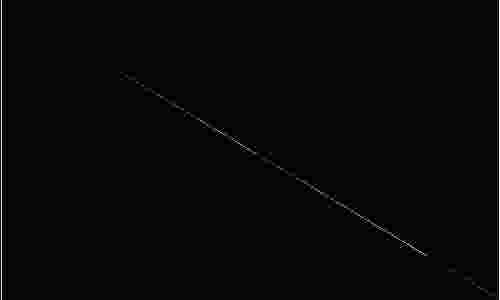
根据已经得到的图像test.jpg,我们创建一个新的图像test1.jpg
 1
 2
 3
 4
 5
 6
 7
 8
 9
10
11
12
13
14
15
16
17
18
19
20
21
22
23
24
25
26
27
28
|
package main

import (
	"fmt"
	"image/jpeg"
	"os"
)

func main() {
	file, err := os.Open("test.jpg")
	if err != nil {
		fmt.Println(err)
	}
	defer file.Close()

	file1, err := os.Create("test1.jpg")
	if err != nil {
		fmt.Println(err)
	}
	defer file1.Close()

	img, err := jpeg.Decode(file) //解码
	if err != nil {
		fmt.Println(err)
	}
	jpeg.Encode(file1, img, &jpeg.Options{5}) //编码,但是将图像质量从100改成5

}
|
对比图像质量为100和5的图像:
质量为100的图像

质量为5的图像

image/png包用法:
image/png实现了png图像的编码和解码
png和jpeg实现方法基本相同,都是对图像进行了编码和解码操作。
1
2
3
4
5
6
7
8
|
func Decode(r io.Reader) (image.Image, error)     //Decode从r中读取一个图片,并返回一个image.image,返回image类型取决于png图片的内容
func DecodeConfig(r io.Reader) (image.Config, error)    //无需解码整个图像变能够获取整个图片的尺寸和颜色
func Encode(w io.Writer, m image.Image) error    //Encode将图片m以PNG的格式写到w中。任何图片都可以被编码,但是哪些不是image.NRGBA的图片编码可能是有损的。
type FormatError
func (e FormatError) Error() string          //FormatError会提示一个输入不是有效PNG的错误。

type UnsupportedError
func (e UnsupportedError) Error() string  //UnsupportedError会提示输入使用一个合法的,但是未实现的PNG特性。
|
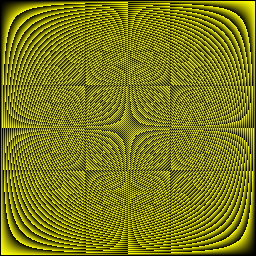
利用png包实现一个png的图像,代码如下:
 1
 2
 3
 4
 5
 6
 7
 8
 9
10
11
12
13
14
15
16
17
18
19
20
21
22
23
24
25
26
27
28
29
30
31
32
33
34
35
36
37
38
39
40
41
42
43
|
package main

import (
	"fmt"
	"image"
	"image/color"
	"image/png"
	"os"
)

const (
	dx = 256
	dy = 256
)

func Pic(dx, dy int) [][]uint8 {
	pic := make([][]uint8, dx)
	for i := range pic {
		pic[i] = make([]uint8, dy)
		for j := range pic[i] {
			pic[i][j] = uint8(i * j % 255)
		}
	}
	return pic
}
func main() {
	file, err := os.Create("test.png")
	if err != nil {
		fmt.Println(err)
	}
	defer file.Close()
	rgba := image.NewRGBA(image.Rect(0, 0, dx, dy))
	for x := 0; x < dx; x++ {
		for y := 0; y < dy; y++ {
			rgba.Set(x, y, color.RGBA{uint8(x * y % 255), uint8(x * y % 255), 0, 255})
		}
	}
	err = png.Encode(file, rgba)
	if err != nil {
		fmt.Println(err)
	}
}
|
图像如下:

由此可见,png和jpeg使用方法类似,只是两种不同的编码和解码方式。
参考:
蝈蝈俊的博客:http://www.cnblogs.com/ghj1976/p/3441536.html
golang技术官网:http://docscn.studygolang.com/pkg/image/jpeg/
文章作者
lixueping
上次更新
2020-01-17
(3d6538b)
许可协议
MIT


